It's no secret that I love looking at Pinterest for inspiration. Ok fine, I'm slightly obsessed. Well yes, maybe just a little more than slightly. Anywho...
I've seen a lot of small ottomans on Pinterest lately. I particularly like
this one, from West Elm.
I love how simple it is and I really love the fabric, but I certainly don't have $350 in the budget to spend on an ottoman. I figured that it looked simple enough to make myself and I already had a large piece of fabric awaiting the perfect project, so I gave it a whirl.
I started my shopping at Lowe's, where I bought two 2 by 2 foot pieces of plywood, four furniture legs, the angle brackets for the legs, and a can of oil rubbed bronze spray paint. In total, I spent about $60 at Lowe's.
Then I went to JoAnn's fabric store, where I bought a large pillow, a square piece of dense foam, and some batting. With sales and coupons, this came to $30.
My husband cut the pieces of plywood down a few inches while I spray painted the legs. Bill then used wood glue to glue the plywood together so it became one piece and would be a solid base for the ottoman. We figured that if people may eventually use it as a seat, we needed it to be nice and sturdy. Bill also took the liberty of attaching the angled brackets to the plywood. These brackets will eventually hold the legs of the ottoman.
We let the wood glue really set for about an hour. Finally, it was time to start the fun part of the project: upholstering the cushion. Bill brought the air compressor and stapler inside for me and I set up shop in our living room. I laid the fabric and batting out on the floor, then layered the pillow, foam, and plywood on top of that.
Making sure that the fabric and batting were pulled nice and tight, I started stapling the fabric to the wood. I put one staple on each side to start, and then worked my way around. I saved the corners for last because
they're annoying I wanted the rest of the fabric to be in place first. Here's a close-up of the progress:
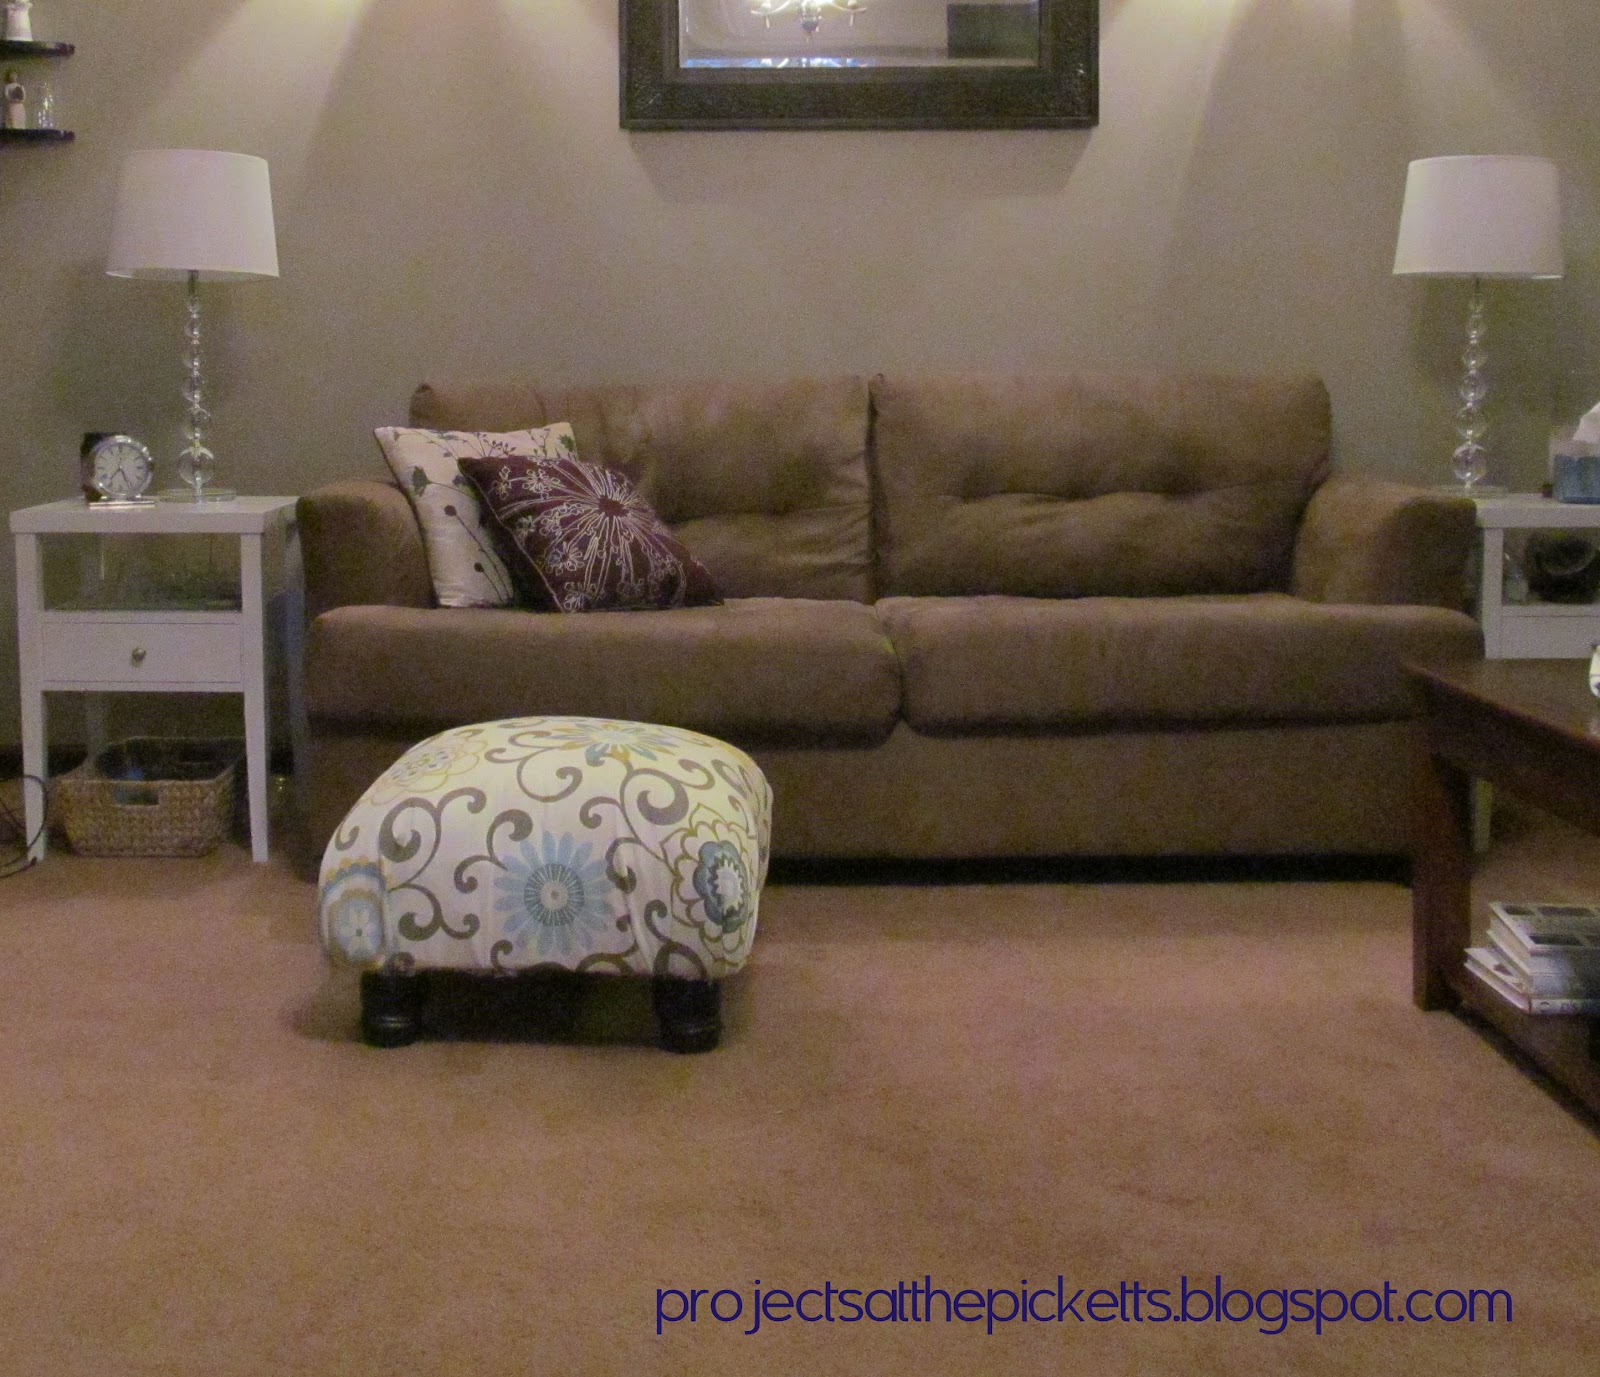
Before attaching the legs, I trimmed all of the excess fabric and batting. If you measure well in the beginning, you shouldn't end up with too much wasted fabric. I had about an inch or two on each side. Once the fabric was all trimmed up and looking decent, I screwed the legs into the anchors that Bill had attached to the plywood earlier. Once I flipped it over, I had a finished product. Ta da!
I'm really happy with the outcome. Including the fabric, I spent about $120. It's not cheap, by any means, but certainly a savings over the original West Elm inspiration.
If I were to make another one in the future, I'd probably make it a little larger. The dimensions of this one are about 22 inches by 22 inches and about 15 inches tall. I did have enough fabric leftover to make a cute pillow cover. I'll give a quick tutorial on that in the future. Putting the pillow on top of the dense foam gives my ottoman a rounded top. If you were looking for yours to be flatter, then just use another block of foam instead.
This could eventually move into another room, but for now I just love how the colors in the fabric match the colors in the
stripes on the tv wall.
This wasn't my first Pinterest inspired project, but it was definitely the most ambitious. Have you completed any Pinterest projects lately? How about any projects using power tools? I know I was hesitant to spend the money on the air compressor and nailer set, but I'm sure loving having them around!
Thanks for reading,
Kathleen


It looks so nice! Can you make me one? The picture of you with the power tool is priceless! I actually laughed out loud!
ReplyDeleteThanks Erica! Of course I can make you one. We'd just need to get the supplies. It's a fun project. Maybe you can use the air compressor stapler too!
ReplyDeleteYour ottoman looks really good. How you did it all by yourself is pretty amazing. You were able to use power tools without help too. I look forward to more projects you may do next time.
ReplyDeleteAlphonse Daigle