Showing posts with label free. Show all posts

Saturday, September 1, 2012

Party at the Pickett's

Sometimes alliteration just gets the best of me.

Anyway, in order to celebrate the end of summer Bill and I threw a little barbeque last night. Since we're still on limited funds (2 weeks until real paychecks start!! Maybe that's why I'm so ready for school to start!) we provided burgers, hot dogs, buffalo chicken dip and mac salad. Since we have great friends, we ended up with a lot of delicious additions - including oreo brownies. Yum!

I also didn't want to spend any money on decorations for the party. We have plenty of stuff in the house and I just brought it outside for the evening.

I started the decorating out front with a simple sign to let the guests know where we were. It also served as a polite warning to watch that Simon didn't try to run away as they came in!
 

We set up four different seating areas, aiming for shaded places for people to sit since it was a bit of a sizzler yesterday.
We set everything up and took pictures in the afternoon while the sun was blazing, but by five o'clock the majority of the yard was shaded and perfect for the party.

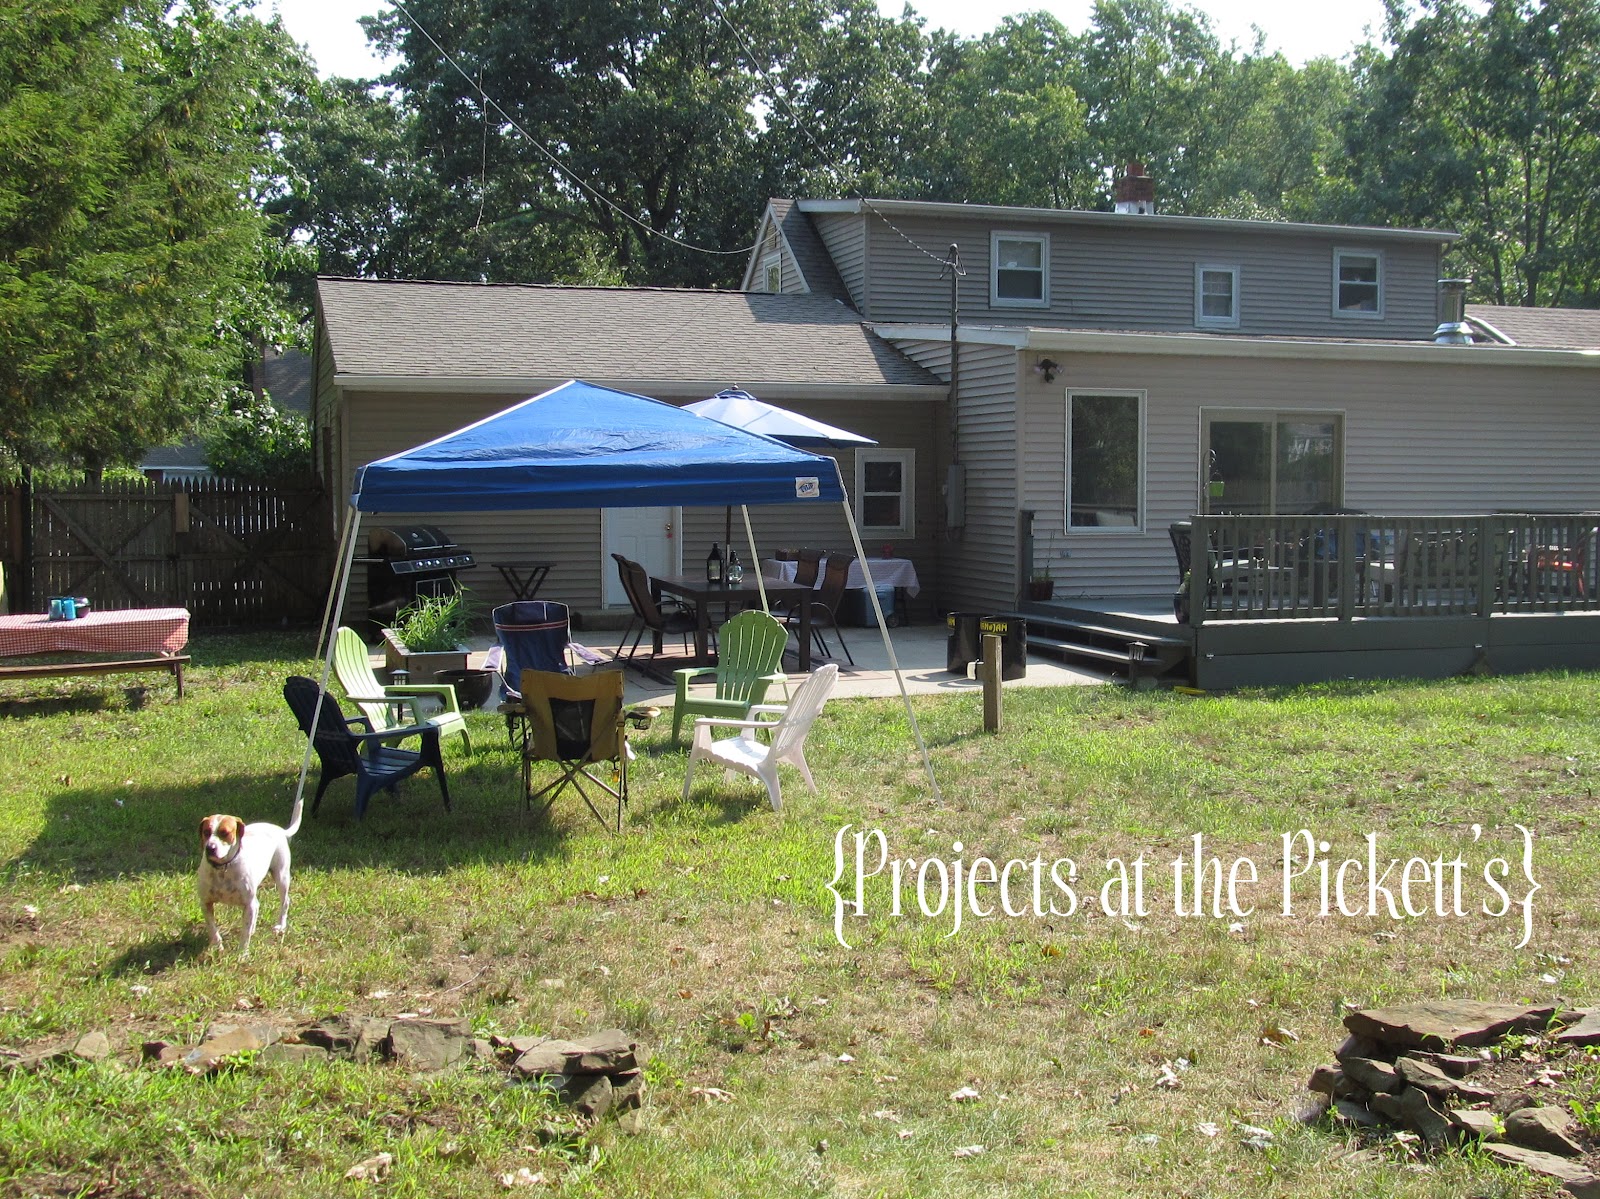
The deck is always set up as a nice conversation area with comfy outdoor furniture. You can also see the EZ Up and the table umbrella are up in an effort to provide more shade. 

Of course I put little centerpieces on each table.

The main outdoor dining table was lantern themed. These looked great once it was dark and the candles were lit. All three of those came from Home Goods a few years back.

The coffee table had more of an outdoorsy theme. Yes, that is a moose arm wrestling a bear. Bill and I picked that and the mini Adirondack chair up in a little shop in Indian Lake. We're still debating whether the moose or the bear would win in an arm wrestling match! If you squint, you can see a couple of the birch candle holders that Bill made for me. They go with everything :) 

I corralled things on the food table to make it look pretty. I started by using a table cloth that I had made for my sister's bridal shower. The paper plates and napkins went into a basket. I love these napkins - another Home Goods find.

Craft tape wrapped around a cylindrical vase made the perfect spot for the forks. In an effort to use what we had already, I had to use some red forks. I was a bit disappointed that they didn't match the rest of the table decor!

Right after we moved in, Bill put in horse shoe pits on the far side of the yard. I thought it would be nice for people to have a place to put their drinks while they were playing, so I stuck these drink holders in the ground. It's just a Progresso soup can, a few washers and nuts, and a threaded metal dowel. I made these before we spent the week at the lake in July. They are super handy and the perfect size to hold the beverage of your choice. There's one on each end of the horse shoe pits.
Here's the view of the yard from the horse shoe pits. The guys set up a game of Kan-Jam in the big open space too.

I strung some white Christmas lights along the railing of the deck to add some lighting and ambiance once the sun went down. I'm pretty sure they might become a permanent fixture out there. I didn't remember to take pictures of them once it was dark out, I was too busy enjoying everyone's company.

I'd say we ended the summer on a high note. It was so fun to spend a relaxing evening with so many of our friends. This might just make going back to school a little easier. Maybe.

What is everyone else doing to wrap up the summer? What's your opinion on the bear/moose arm wrestling debate?

Thanks for reading,
Kathleen


Linking up to: Simply Designing
I Heart Nap Time
SixSistersStuff.com

Wednesday, July 25, 2012

Craft Room Chaos

As you can tell, I do a lot of projects around here. I'm pretty good about cleaning up the place where I did the project right away, but recently my craft room has gotten a little out of control. Refer to evidence #1:

The West Elm knock-off felt bins were overflowing. The craft table was a mess. Bottom line, it was a disaster and needed help. Since I've put myself on a spending freeze (the whole summer's off thing is great, except for the no paycheck aspect!) I didn't want to spend any money to organize the space. I was enthusiastic to get started, unlike my friend here:
I started by returning anything that does not belong here to its proper home. Then I cleared out the felt bins to see what fabric I had in there. Since I have two bins, I separated the fabric into two piles - stuff I've used before and stuff I have yet to use. I folded it all up and put it back in the bins. While I was emptying the bins, I found a bunch of piping and other types of fabric edging. Luckily, a few months ago, I bought an office organizer for $7 at Walmart and it has just sat empty, until now. I even made a cute little label for it:

 It worked out perfectly because it came with those dividers. I simply rolled up the edging and secured the rolls with twine that I had.

I tend to be a pack rat save anything that I think may eventually come in handy. For instance, I saved the cardboard that came in the package when we bought new sheets. A little weird, yes, but I knew that one day it was going to be useful! I have several photo mattes that needed to be corralled and they all fit perfect tucked into the cardboard. Unfortunately, the cardboard had seen better days. Probably before it was used in the packaging for a sheet set. Anyway. I grabbed a few pieces of scrapbook paper and Modge Podge.
Its been a long time since I've used Modge Podge and now I'm wondering why, because this stuff is great! I painted on a thin layer where the paper needed to lay and then put the paper in place. A few minutes later, I used the Modge Podge as a sealer so the paper would not tear as I was trying to access the photo mattes. I made another label, and voila!
Sorry the picture is so blurry, I'm obviously still trying to figure out this new camera.

Lastly, I took advantage of having a zillion vases/candle holders and used a few of them to hold my supply of ribbon. These few projects really cleaned up those shelves!
The rest of the organizing process was really just straightening up and putting things back where they belonged. The finished product is a pretty big improvement though:
There are still a few things I want to do in here, like cover an ugly bulletin board in fabric to make it prettier and hang it. The white walls and plain curtains are also starting to drive me batty, so they might get tackled soon. Luckily I have nothing but time to do more projects until school starts - well once this week's APPR training is over. I'll certainly keep you posted.

What type of organizing have you accomplished recently? Any free/easy ideas? Please share!

Thanks for reading,
Kathleen

I'm linking this post at: calm


Home Stories A2Z

Thursday, July 19, 2012

Great Eye-dea

Sometimes the puns just come too easily.

We have a pretty generously sized master bathroom and a small linen closet is tucked into the corner of the room. Last summer, I got my organization on and whipped the closet into shape. I even used my label maker. I wear my dork title proudly!
The only thing that didn't get done at that time was a way to organize/display all of my necklaces. They were in a box and were constantly getting tangled. Plus, since I could not see them, I really didn't wear them very often.

I looked around on Pinterest for ideas, but nothing struck my fancy. Then one day I was in Bill's workshop looking for stuff to hang a picture and came across eye hooks. A light went on in my brain and about 20 minutes later, I had this:
 It's really hard to get a picture of this in such a small space, but I tried!
As you can see, there were pieces of wood already in the closet as shelf supports. All I did was drill small holes about two inches apart and then screwed in the eye hooks. Each hook is strong enough to hold a few necklaces. There's enough space from the bottom hooks to hang the longer necklaces there.

It's been like this for a few months now and I'm really happy with how it's working. I can easily see and get to all of my necklaces. Best of all, since the wood was already in the closet and we already owned the eye hooks, this was a free solution! Love that!

On a different note, yesterday I got to babysit my adorable nephew. He's almost 2 and so fun and fearless. I brought him to my house for a bit and he got to meet Simon. Simon was a little unsure at first - check out this side-eye!
But he grew to love him!

Thanks for reading,
Kathleen


Thursday, April 12, 2012

All Natural

A few weeks ago, Bill needed to cut down a few trees on our property that were dying. One of the trees that he cut down was a birch tree. While he was cutting up the pieces, he asked me if I wanted him to keep any of the wood. That man knows me too well! 


I decided to use some of the pieces of the birch tree to make some outdoor candle holders. Bill cut them down to size and then used a 1 inch bit to drill holes in them.

He made 4 that will stand up and then cut one log down the middle the long way. After he was done drilling, I sanded the tops and holes and then sprayed them with a coat of outdoor sealer. Hopefully this will keep them in good shape.


I wish the weather were nicer out today so I could get a few pictures with the sun out, but no such luck. Here they are with the votive candles in them.


Again, ignore the shape of the table. We certainly need to do something to spruce up all of the outdoor furniture. I like this view too because you can see the grain of the wood.


Here's the long one. I picture it going on the outdoor dining table when we have barbecues or guests over the summer.


Ignore Simon's behind in the background! Since we recycled the wood and already had all of the tools, this was another free project. It's amazing how many free things you can do and make with stuff you already have. Do you have any good projects that you've completed with recycled materials? I'd love to hear about it!

Thanks for reading,
Kathleen

Tuesday, March 27, 2012

Diamonds are a Girls Best Friend

White walls bore me. I bought my first house because I was tired of looking at plain white walls in my apartment. As soon as I moved into that house I painted every room in it. My craft room is the only room in our current house that has white walls. I added chevrons to the short front wall, but the rest of the room is white with white trim. For a little while, I was enjoying the serenity of it.

After spending a few hours at my white craft table in my white craft room last weekend, it was time for a bit of a change.  I built the craft table several years ago from a pre-finished plank of wood and four plumbing pipes. I painted the top white, since I was unfamiliar with staining and then spray painted the legs black. Come to think of it, the legs of this table may just be the first thing I ever spray painted in the name of home decor!

 
Clearly, I enjoy geometric patterns. Chevrons, stripes, the stencil and even different fabrics I've used are all inspired by geometry. I brainstormed a bit and of course turned to pinterest to find some new ideas. I needed something that would be easy and quick. This couldn't turn into an all day project, just something to allow me to procrastinate grading papers. I started to think of different ways I could tape off a pattern on the table top and it suddenly hit me: diamonds!

This was a really easy project, especially since I had all of the materials on hand. I used green frog tape, a speed square and paint. I used the speed square to ensure the diamonds were all evenly spaced and equal in size.


Tape of the lines in both directions to create the diamond pattern. I actually liked the look of it just using the tape!


Make sure that the background color is the color that you want to create the lines on the desk. You should actually make sure of this before you start any of the taping. I wanted gray to be the predominant color of the desk, so I didn't need to paint the whole desk first. Ok, now that I've cleared that up...


I painted two thin coats using the same gray paint that I used for the chevrons.  As soon as the second coat was dry, I pulled up the tape. I was amazed at how crisp the lines were!


Once the paint was dry, I put my sewing machine and a basket back on the table top. I just love how it came out.


Here's a view looking right at the desk so you can see the whole pattern.


Since I used materials that I already had, add this to the free project list. It adds a little character to this side of the room.  I still think I might want to paint the walls. Maybe over April vacation? We'll see!

Thanks for reading,
Kathleen I linked this post at:
Home Stories A2Z

Friday, March 2, 2012

The Cheat Sheet

As a math teacher, I am generally pretty good with numbers. I remember dates well, even ones that may not be that important to anyone else. My husband is a smart man, but dates are not his thing. Shortly after we got married, I decided to remedy that problem by making him a cheat sheet. It couldn't any old cheat sheet, it had to be pretty enough to display on the wall. 

I played around in Word with different fonts until I found 4 that I liked. I used those fonts to write the dates of four milestones in our relationship. Then I printed them out on pretty gold paper and slapped them in a frame with a few photos from our wedding.  Here's what I ended up with:

I hung the frame in a prominent place in our home: the photo gallery wall. My husband laughed about this at first, but I think he secretly finds it useful!!
This was a super quick project and the only cost was that of the frame. I think it was definitely worth the time and money so I never spend an anniversary upset because someone forgot about it!

Do any of you have a way to subtly remind your significant other of important dates?

Thanks for reading,
Kathleen

Tuesday, February 21, 2012

Free paint Chip Art

We repainted our master bedroom a few months ago. I've been trying to take my time and only put things up on the wall that I really like. A few weeks ago I put up a couple of shelves that I bought at Lowe's. I love the shelves, but now the other wall was just begging to be filled up!
I had seen several projects using paint chips around the blog world. It looked pretty easy, so I went to Lowe's and picked up a bunch of paint chips. When I say a bunch, I really mean about 50. I'm sure I looked like a crazy lady, but it was well worth any strange looks!
 I found an extra frame that I had around the house and then taped a few pieces of card stock together to use as my background. The most time-consuming part was cutting all of the paint chips down to a uniform size. When I was done, I was left with a pile of usable chips and then all of the scraps.
 The next part was the fun part. I laid out all of the paint chips onto my card stock background. I used the pink ones to make a rough picture of a heart in the middle.  Once I was happy with the look, I used a regular old glue stick to glue all 105 pieces into place.
 Hanging it up in our bedroom was nice and quick.  I love how it turned out. Its a departure from what I normally hang in our house, and I'm really happy with it. I think the corner looks a lot happier too. And it was F-R-E-E.  You can't beat free!
 What do you guys think? Have you used anything free lately to make some art? Taken an excessive amount of anything from a store lately... or ever? It's only slightly embarrassing!